There are two ways you can use Jigsaw Inventory System, the first option is to use the Multiplayer Component and let Jigsaw handle all of you inventory interactions, of course you will still be able to customize the layout of your inventory and handle equipment yourself.
The other options is to use Jigsaw widgets to build your own system, Jigsaw widgets provide many built in functions such as adding, removing items etc. the only difference is you have to control the flow of your inventor yourself and also handle replication.
Today we will take a look at how to utilize the power of Jigsaw Multiplayer Component to easily get your inventory up and running in few minutes, although this component does handle multiplayer it is absolutely fine to use it in a single player game.
We are going to set everything up from scratch to achieve something similar to what we have in the demo map, for that I will be working with an empty map and a character and player controller, these blueprints have nothing in them expect for movement logic in the character blueprint
Video Tutorial
How to Migrate Jigsaw to another project
Creating The Inventory Widget
Let’s go ahead and create our inventory widget, this is where you decide how it should look like, for example how many equipment slot and the overall layout of the inventory. I recommend you watch the first few minutes of the video above to see how I create my inventory widget.
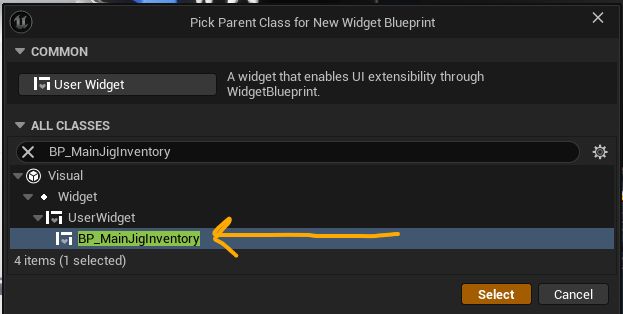
Add a new widget blueprint based off BP_MainJigInventory as a parent class. See image below.
Feel free to design your widget however you want, the main thing we need to do is add a few equipment slots, these are JSIContainer widgets you can add them from the Palette.
Set the container tag to EquipTo, specify the slot size and indicate the supported item type tags. Here’s how mine looks like

From the palette add BP_EquipToContent, this will be used to display the loot content of a container like a pickup or loot container. I placed mine in the middle of the widget.
Add something like a vertical box, this will be used to show your pickup container content, for example when a backpack is equipped we can add its content in this vertical box.
Be sure to add DropItemBackGwidget to your widget to allow dropping items using drag and drop.
You can add BP_CharPreview if you want to use the character preview system
BP_CraftingWidget can also be added to handle crafting and BP_VicinityLoot to handle vicinity loot.
Now switch to the graph section, in the My Blueprint panel click add new and override function, select GetInventoryData, in this function we will indicate the list of equipment slots, the BP_EquipToContent where loot content should show up, the vertical box or equivalent where equipment content will show up and if used we can indicate the preview character widget and the class.
Here’s how mine looks like:
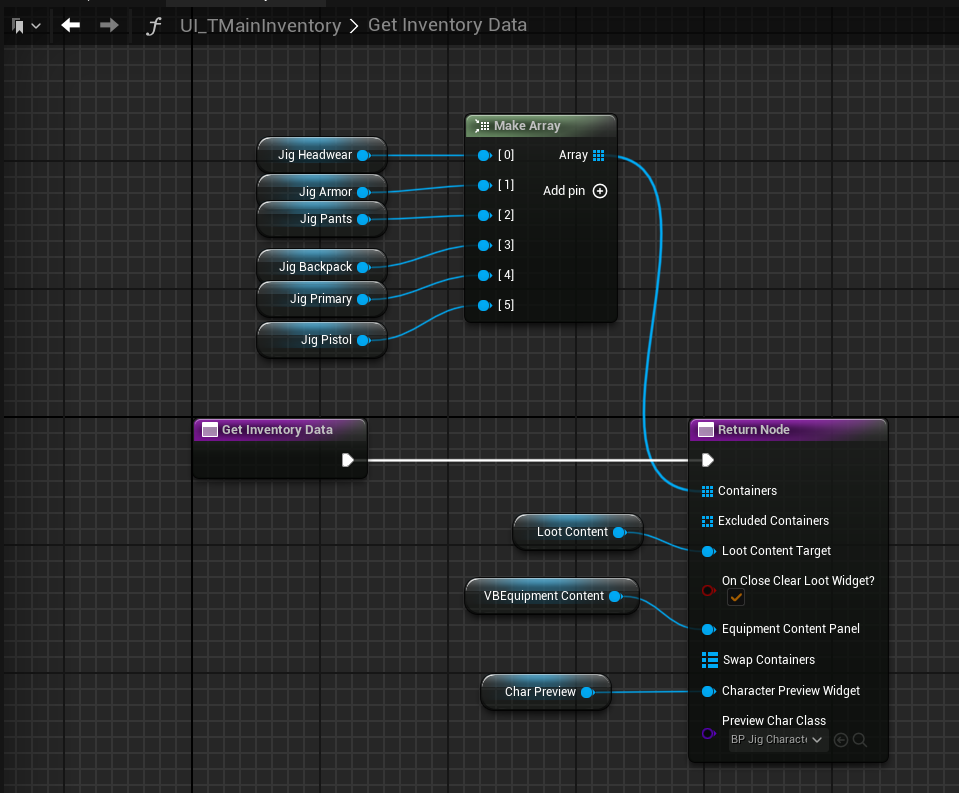
The order of Containers is important we need to respect that later.
Swap Containers is used for two containers that are able to swap, for example in the demo example I have primary and secondary slots.
Excluded Containers is used for certain containers that should not be considered for when picking up items and other gameplay interactions. For example in the demo we have a stash container built in the player’s inventory, so that particular container should be excluded.
The preview class should be BP_JigCharacterPreview by default, feel free to modify the mesh inside.
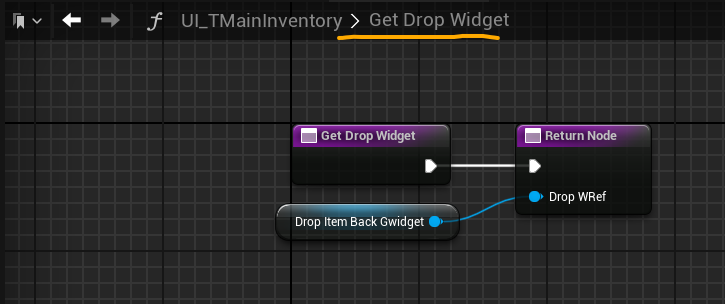
Override the function GetDropWidget and indicate the DropItemBackGWidget
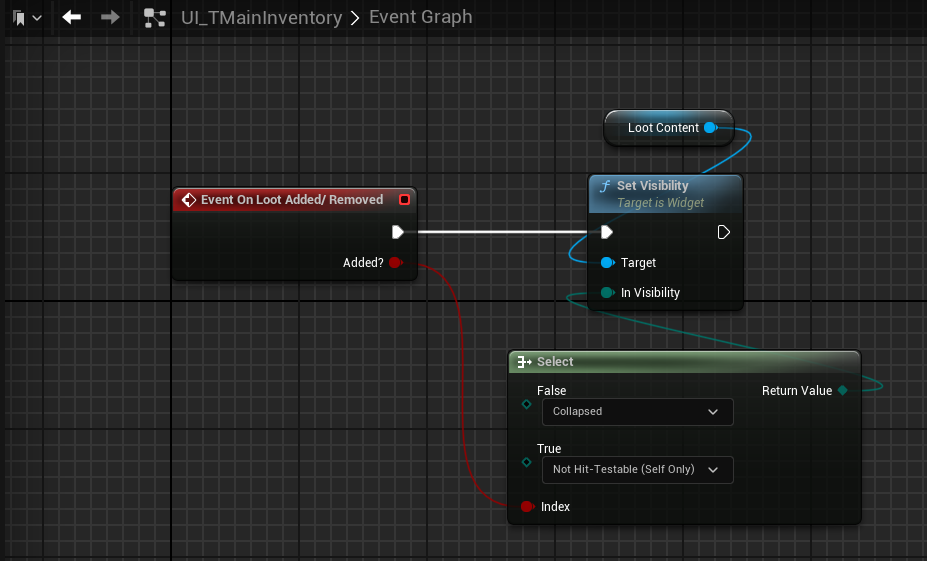
You use this event to know when a loot content is displayed, this is usually used to hide or show certain elements of your inventory, in this case I used it to collapse or show the loot content widget because I set it to collapsed by default.
The Character BP Setup
Let’s setup the character BP:
First let’s add these three components: BP_JigMultiplayer, BP_JigHelperComp and JigContextMenuComp
Next add these three interfaces: BP_JigCharacterInterface, BP_JigMPComponentInterface and BP_MpInteractInterface
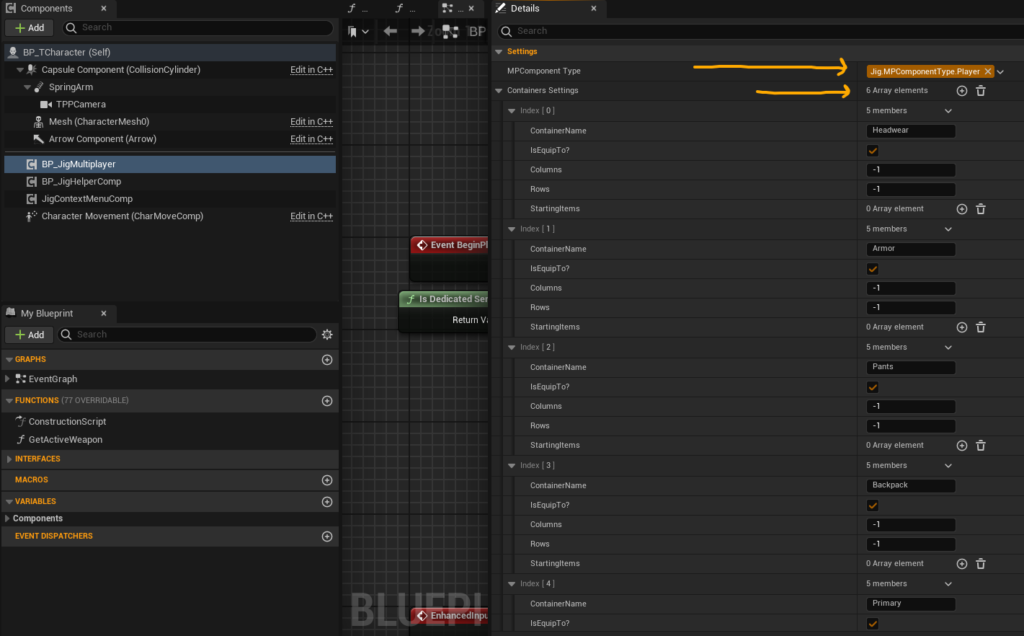
BP_JigMultiplayer setup
Select the BP_JigMultiplayer component and change the MPComponent Type tag to Player and indicate your main inventory slots while respecting the same order we indicated in GetInventoryData we handled previously.
BP_JigHelperComp setup
Select the BP_JigHelperComp and configured your main slots by indicate the tag the same way we did in the inventory widget and the same container name set in the BP_JigMultiplayerComp.
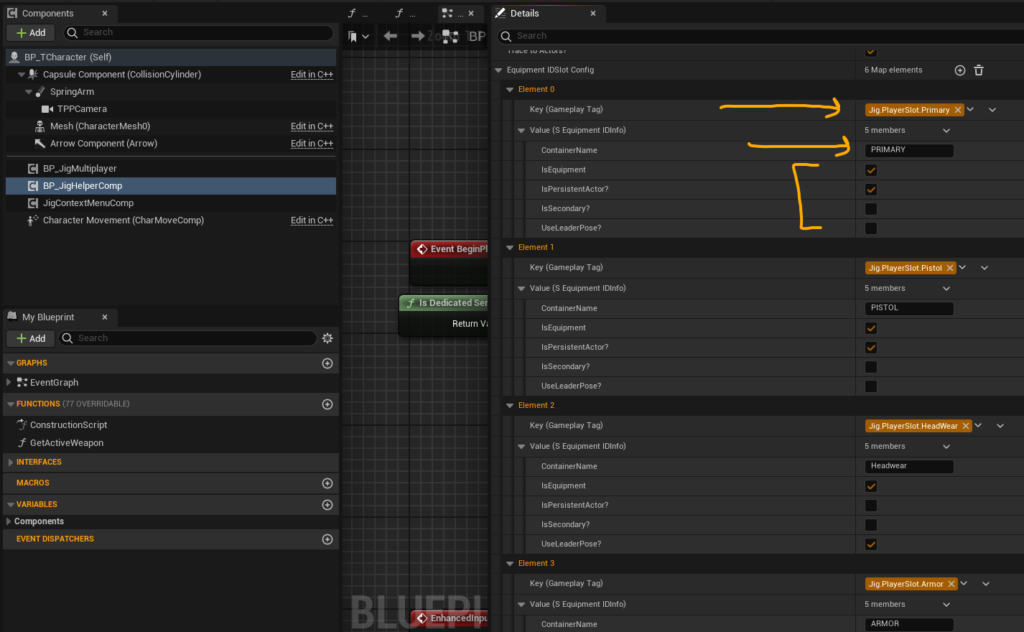
IsEquipment should be true if the slot can hold one item essentially and set to false if the container has multiple columns/rows.
IsPersistentActor if false the pickup actor will be destroyed and a simple static/skeletal mesh will be equipped, this should be false for clothes, backpack etc and should be true for your weapon.
UseLeaderPose is used for equipment skeletal meses that need to follow the main mesh animation, for example clothes.
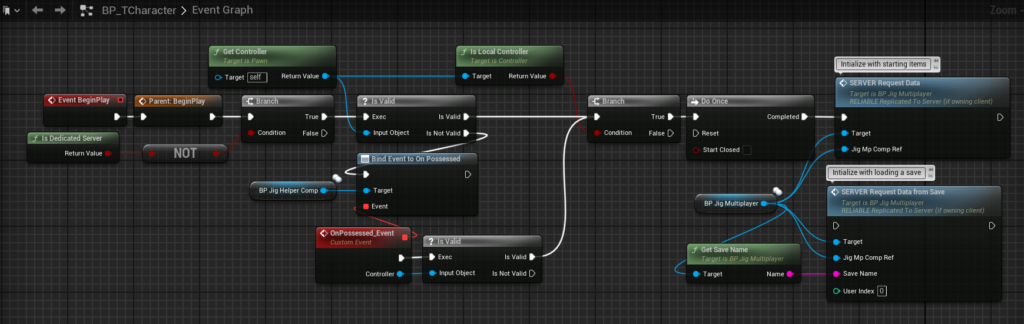
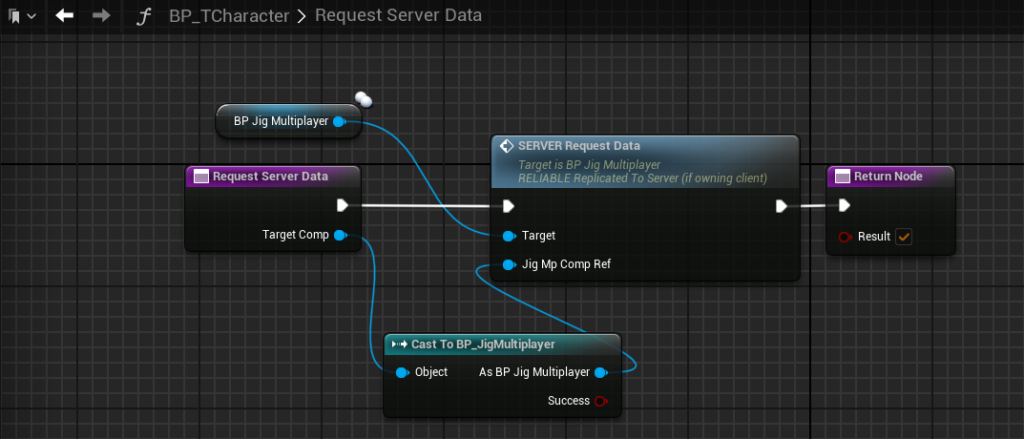
Let’s used the character begin play to initialize the multiplayer component. We need to use Server request data to initialize the component and load starting items if available. Alternatively you can use Request data from save to load a saved data, if the data is not found it will fall back to loading starting items. In any case you need to use one of the two to initialize the component.
Interaction and Interface System
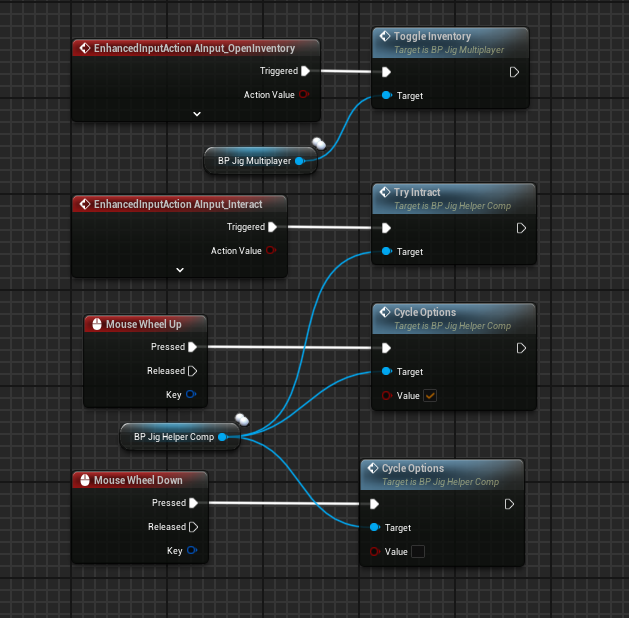
Now we need a way to interact with pickups and loot containers. Use whatever input your prefer and do the same.
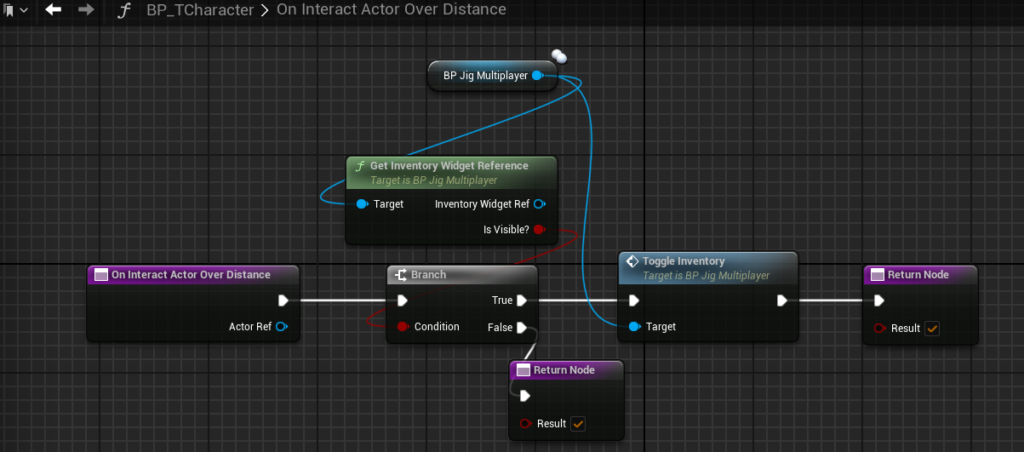
Toggle inventory is used to show/hide your inventory widget.
Try interact is used to try and interact with whatever we’re looking at
Mouse wheel Up/Down is used to cycle between different interaction options such as pickup/search
Let’s go ahead and handle certain interface function responsible for those interactions.
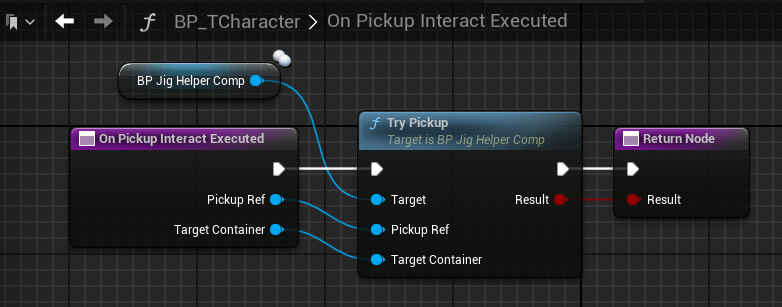
First one is On Pickup Interact Executed, this will be called when the interaction input pressed while looking at a pickup, in this case we forward the event to the helper and let it handle it based on configuration we indicated earlier.
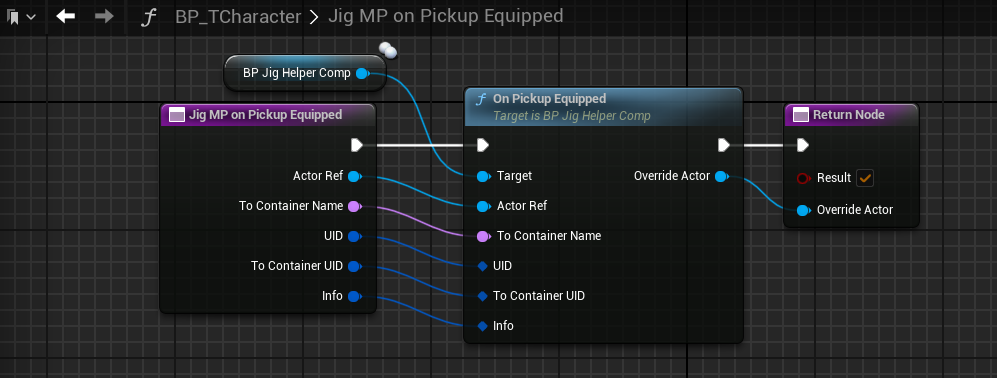
If we managed to equip the pickup, the item is now in our inventory data but we need to do something with the pickup BP such as destroy it, equip a mesh or weapon etc. On Pickup Equipped handles that, again we forward that to the helper.
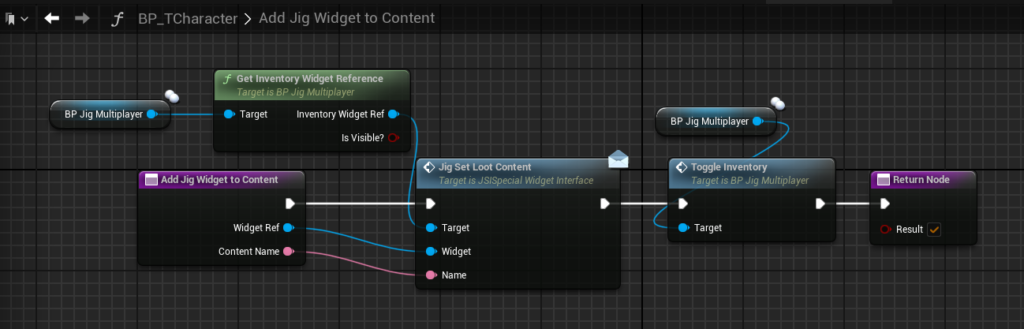
Next function handles looting containers, for example looting an ammo box I want to show the inventory and display the loot content. This function handles that, first we add the widget content and show the inventory.
Showing the loot content is not enough we need the server to send up the loot data because Jigsaw is event based for performance reasons.
This function handles sending loot data when looting a container or pickup container.
So far you should be able to loot containers and pickups but your character BP is not able to equip/unequip visually in some cases, let’s go ahead and fix that.
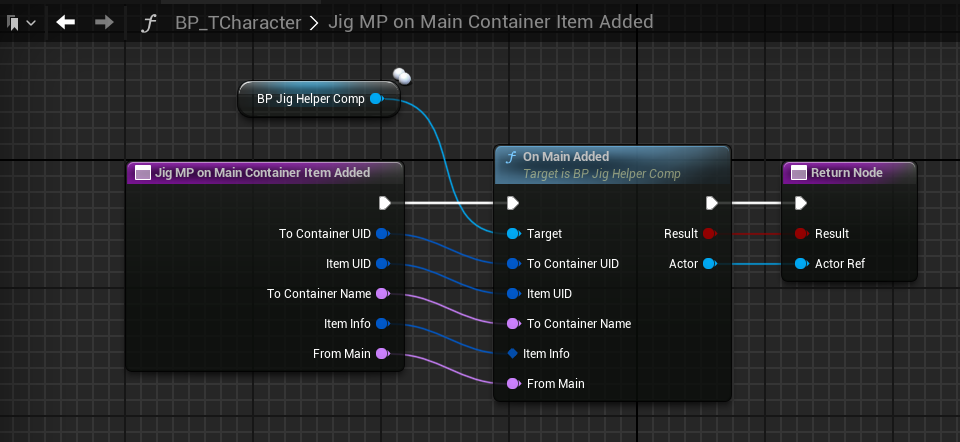
On main added this will be called when equipping something via drag and drop or loading starting items or save.
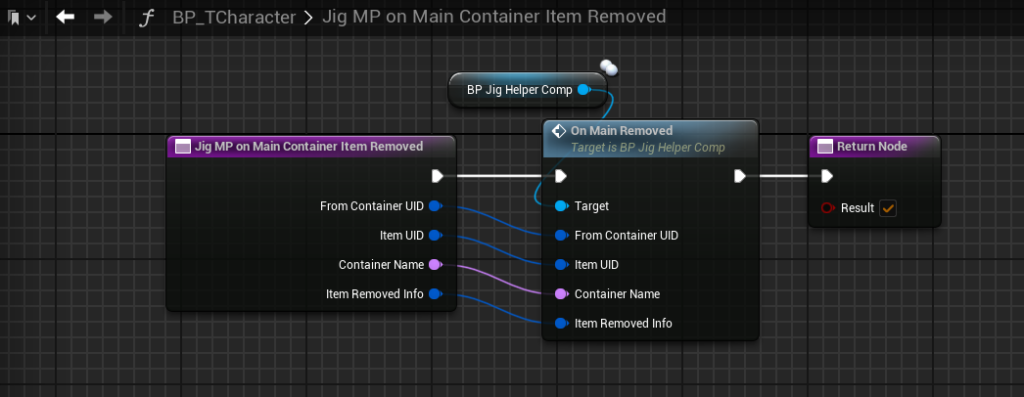
On main removed when unequipping something from your main slot.
Next one is when looting a container but then you walk too far, we need to cancel out looting. This is the function, we simply close the inventor and that should also clear the loot widget.
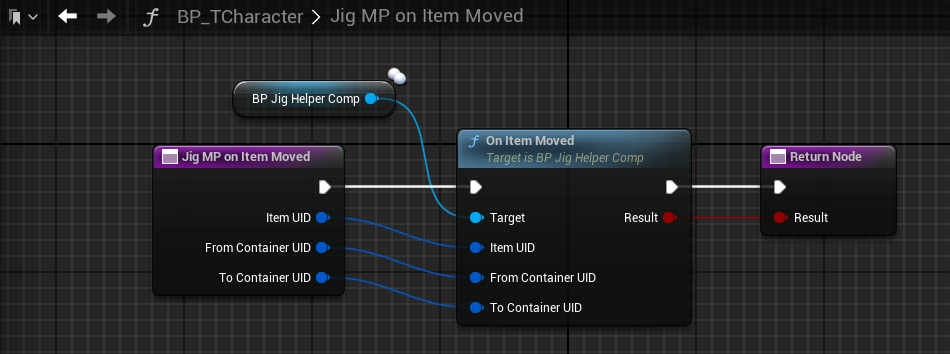
Next one is On item moved, this one will be called when moving an item within your own inventory.
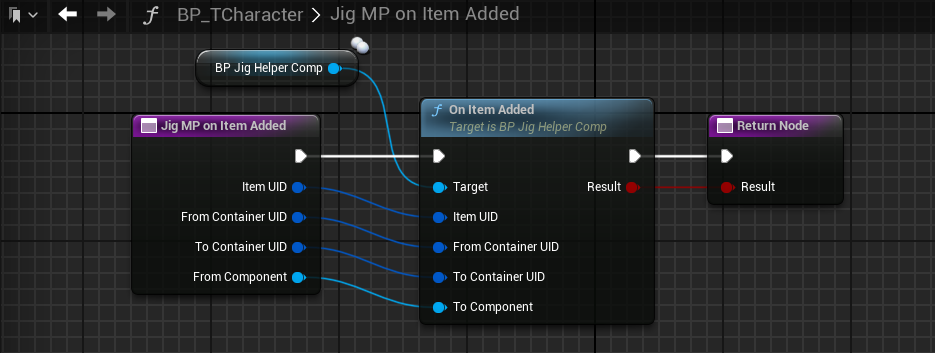
On item added, this will be called when an item is added to your inventory from an external source such as a loot container box.
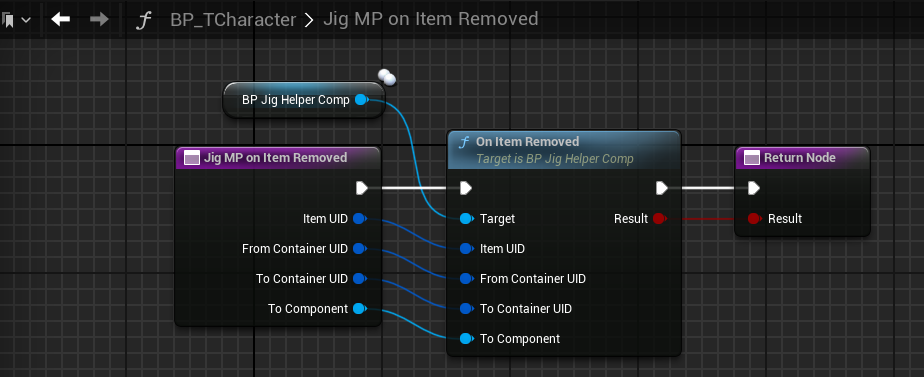
On item removed is same as added but your transferred an item from your inventory to some loot container.
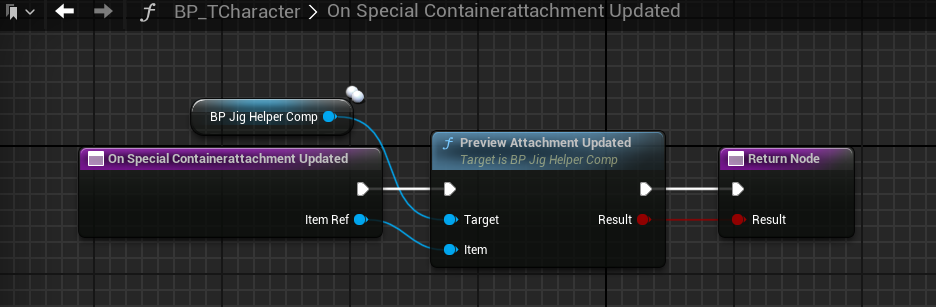
We will forward these events to the helper, in this case they are used to update attachments.
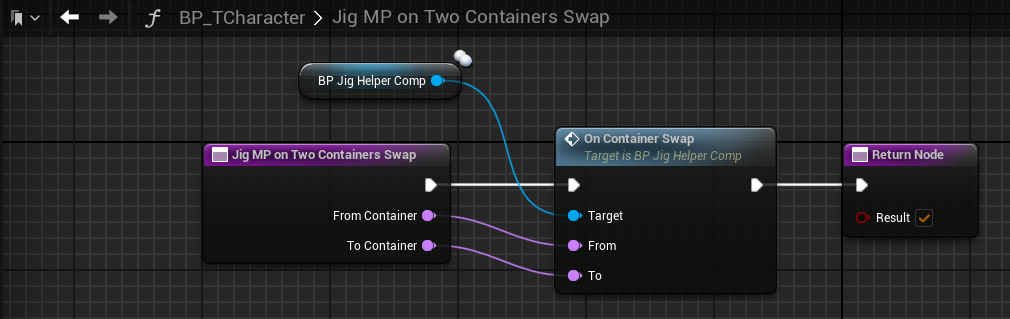
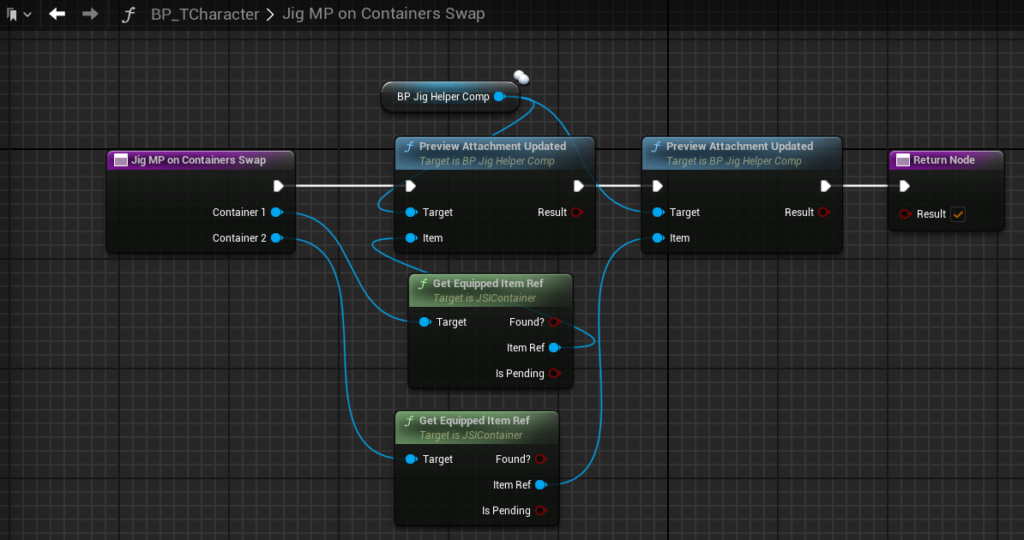
When two equipment slots are swapped this gets called
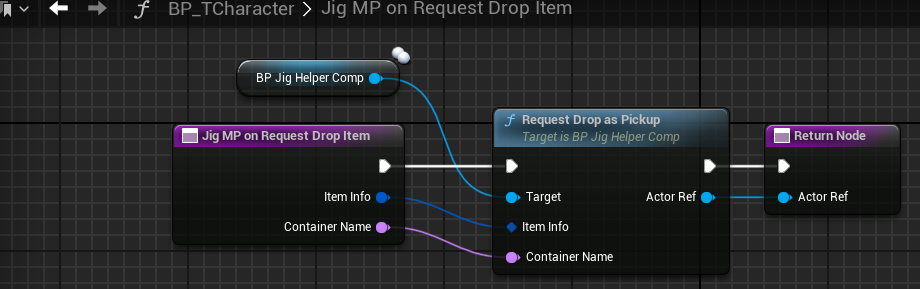
When dropping an item this gets called so we can spawn a pickup BP
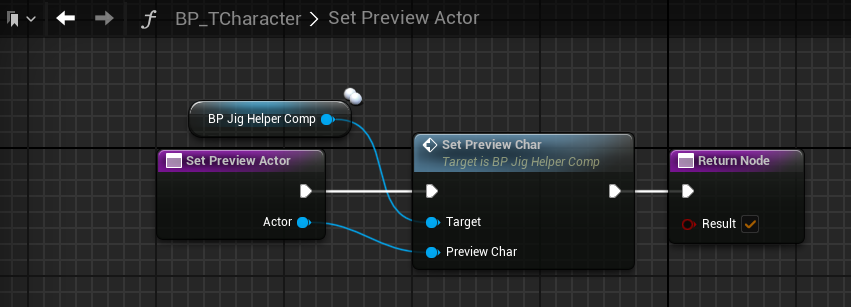
So far you should be able to pickup items and move them around while seeing the effect on your character equipment. Let’s make sure the preview character is being updated.
The following three function are mainly to update the preview character.
Equipped Actors and Active Weapon
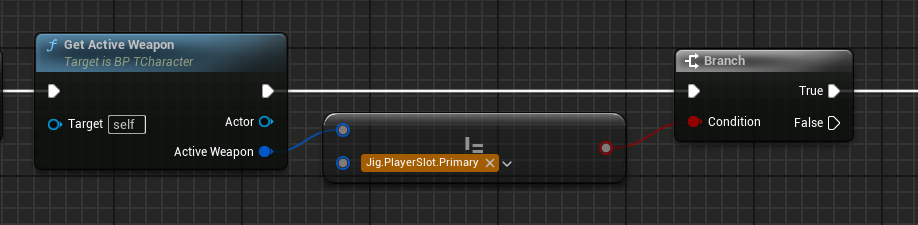
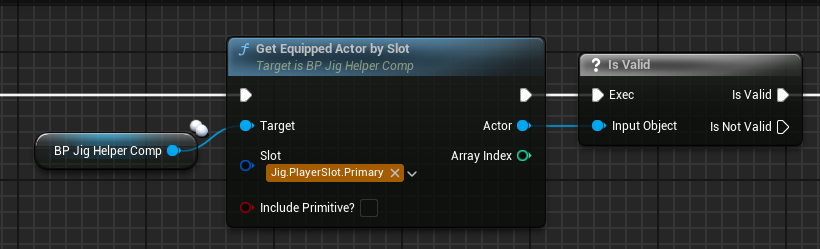
First to access equipped actors we can use this function, for example I want to access my primary.
Include Primitive: this is mainly to access non persistent actors such as equipped pants which should be in most cases a simple skeletal mesh.
Here’s an example if getting that primary weapon and equipping it, notice how we update the active weapon at the end
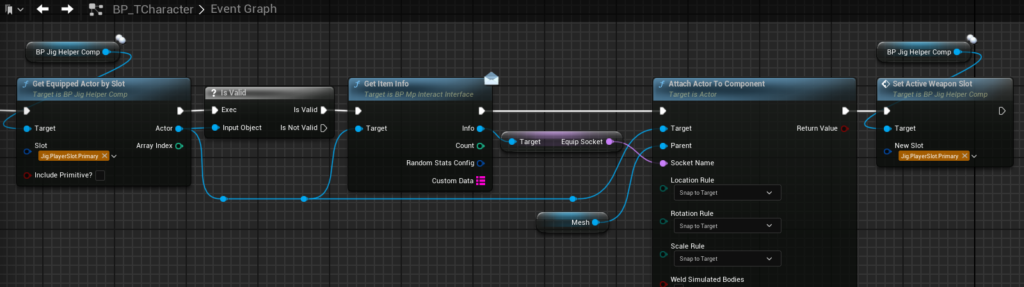
By updating the active slot we know what we are currently equipping, next time I can check like this.